Photometry with IRIS
Download IRIS (Free: all purpose astro-software)
Iris is an excellent program and literally it does it all. It is under continuous development by his programmer, Christian Buil. Initially it's functions were only command line but lately the menus came to ease those who are fond of clicking the mouse instead of clicking the keyboard.
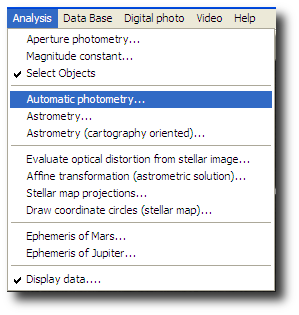
One of the functions of IRIS is the Automatic Photometry, that will be the function we target in this small tutorial.
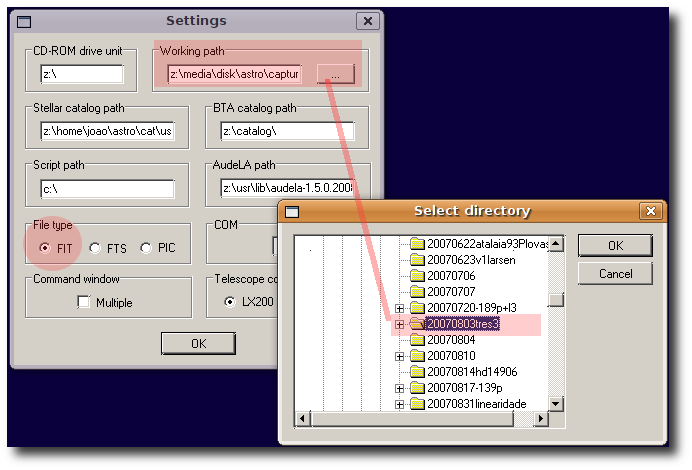
To start using IRIS we need to set the images path. In Menu: FILE > Settings, or simply CRTL R, we call the dialog box and change the path to point to our working directory. We also change the image extension, if needed, to .FIT extension.

Attention, This tutorial is only about photometry, we expect all the images are already reduced with bias, dark frame, flat frame and ALIGNED. If not, stop and calibrate/reduce your images.
I don't have to say that you can also use Iris to do the images pre-treatment.
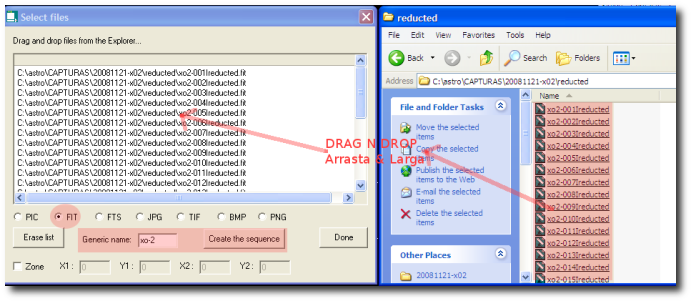
Next step is to name the images in a way IRIS likes it, they must be sequential and shouldn't have trialling zeros, if your images already correspond to this criteria and look like this : tres3-1.fit, tres3-2, tres3-3.fit,…tres3-10.fit, skip this part.
If they look like this : tres3-001.fit, tres3-002.fit…tres3-010.fit…etc, then you should do this step, click on
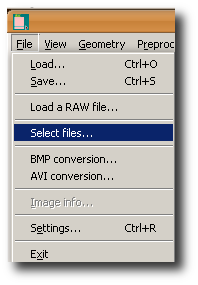
Menu: File >Select files…
After naming your images sequentially there is another important step to make the images suitable to use in photometry with IRIS.
This step has to do with the fact IRIS works in 15bit and not in 16bit, it recognizes a dynamic range of 0-32676 instead of 0-65535.
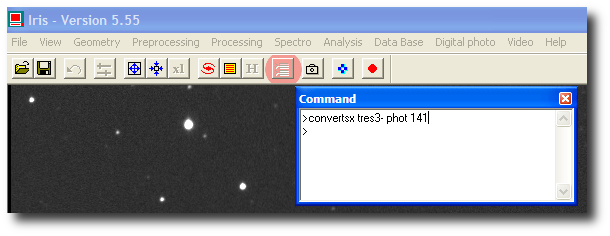
The conversion is made in the IRIS Command Line. To call the Command Line dialog you have to click the icon in the MENU BAR.

The Command Line dialog box pops up and we should wright the desired command: CONVERTSX, it's syntax is : CONVERTSX [namein] [nameout] [imagesNumber]. In this case its like this: (CONVERTSX tres3- phot 141), All images will be multiply by 0.5, this way all values will be in the desired range of 0-32676.
After these steps we are ready to perform the photometry.
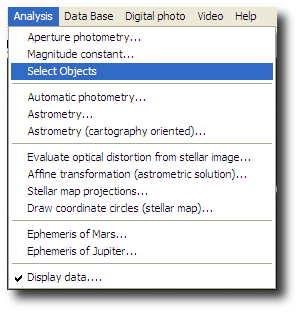
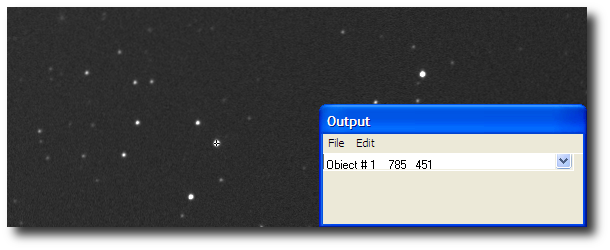
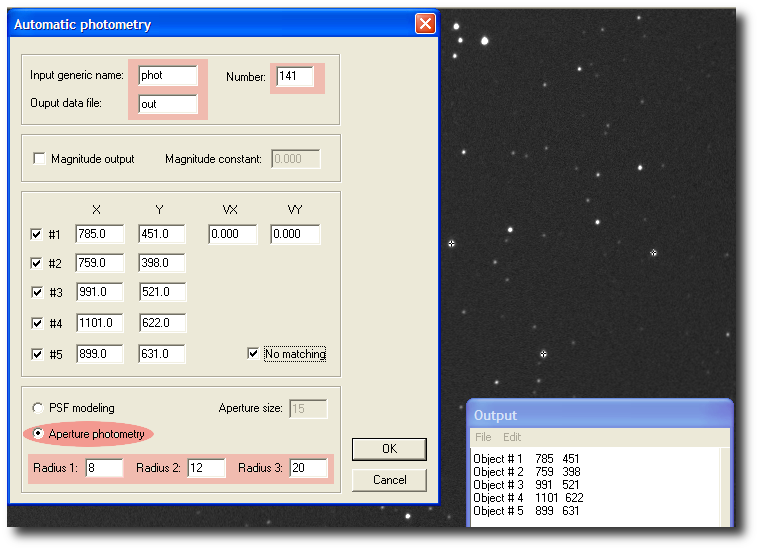
First we need to select the stars, click on the MENU : Analysis > Select Objects, the mouse changed from a pointer to a target selector, we'll use it to select the stars. First to be selected is our photometry TARGET, in this case is the TRES-3 star, next we select the compare stars. The stars became marked with a small cross.
Here you can see the stars marked, I gave them number to show in the tutorial, in IRIS only the small marks show up.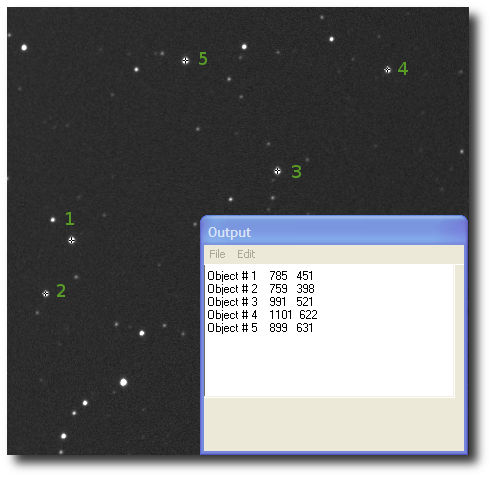
After the stars selection we run the Automatic Photometry on our series by choosing in the MENU : Analysis > Automatic Photometry
In the photometry dialog box we fill the fields with names for the input images and for the output. We also chose the Aperture Photometry and adjust if needed the pre-defined values. If the images are well focused, it should be OK the default values, but if they are out of focus probably its wise to adjust the radius of the photometry annulus. Keep an eye on the session FWHM, if it was the same during the whole capture with minor differences, no need to adjust, if not, we should chose a radius according to the largest FWHM of the fattest star.
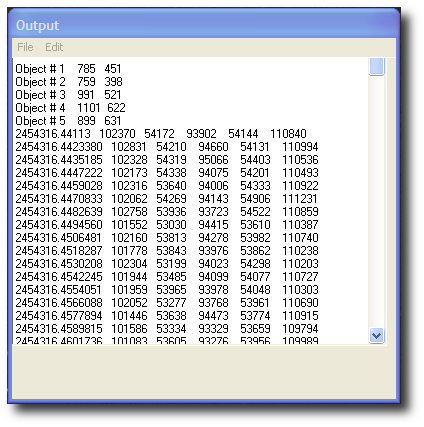
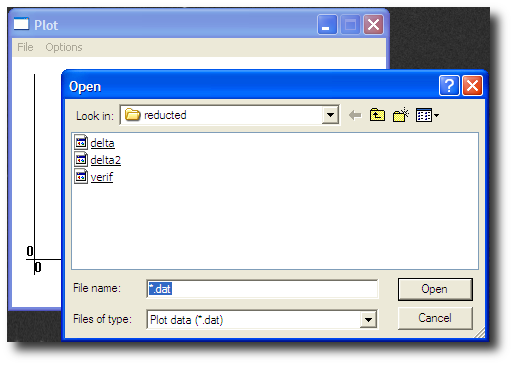
When we click OK in the photometry dialog box, the photometry shows up in the DIALOG. A part from that output we will have tree more files in our working directory were the images are, it's delta.dat, delta2.dat and verif.dat, these files are text files and can be plotted.
To plot we can use IRIS itself by choosing in the MENU : View > Plot.
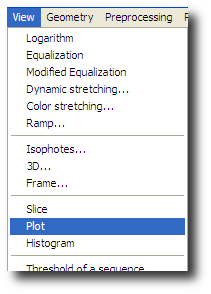
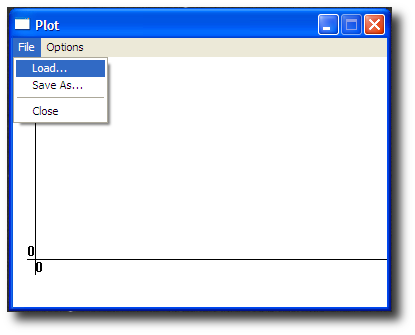
Load the file VERIF.DAT by clicking the MENU : LOAD , OPEN.
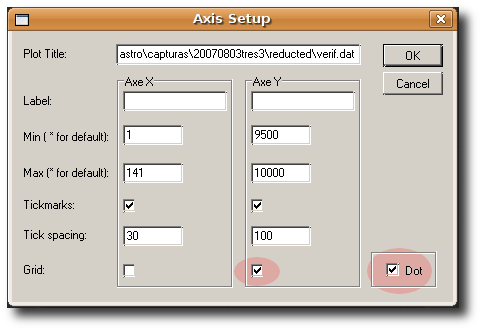
We can alter some plotting parameters in AXIS SETUP.
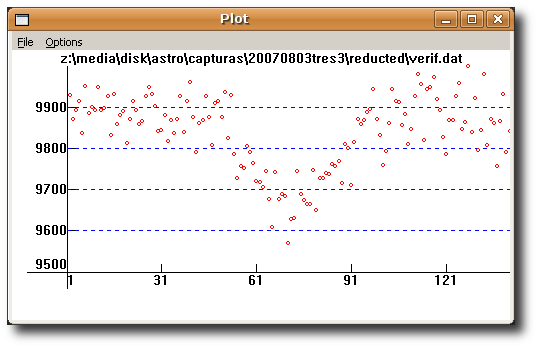
Finally the result shows up.
I hope this tutorial is useful with this quick explanation on how to perform photometry with IRIS.
We can plot the delta2.dat file in another plotting program of our choice, or with a speadshet program with Graph or Chart. In my case I like OpenOffice.org very much and it's FREE.
Joao Gregorio