Here I fully reproduce Filipe Alves's page under his permission
| Title: | Capturing the Colors of the Moon | |
| Authors: | Alves, Filipe | |
| Publication: | Sky and Telescope, volume 110, number 7, page 120. (S&T Homepage) | |
| Publication Date: | 07/2005 | |
| Origin: | S&T | |
| Bibliographic Code: | 2005S&T…110a.120A |
How to capture the color of the Moon.
by Filipe Alves

Fig.1
Usually we see the moon as a monochromatic world only with releif and albedo features to observe, but there is something on the surface hidden to the naked eye that everyone can capture with a digital camera, or just plain analog film.
If you observe some particular features on the lunar surface through a telescope you will notice for sure some tiny differences in the hues of the various greys of the surface, as there are many different geological formations composed of different minerals, so there must be a difference, even though very subtle to our eyes, in the color. But to digital and analogic image capture devices it is an easy task to record color information with quite good accuracy, so it can be enhanced afterwords by digital processing to allow us to see it too!

Fig.2
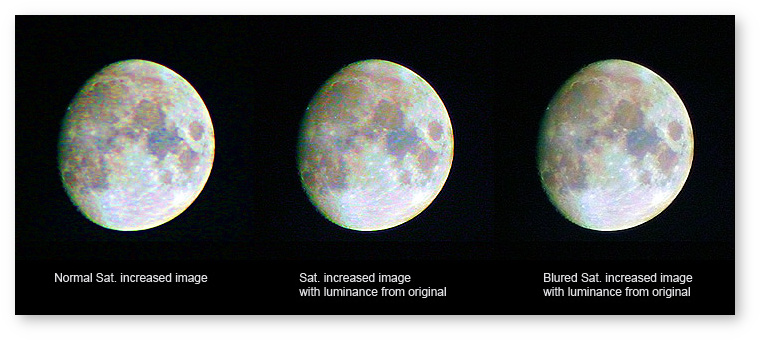
Many times astrophotographers desaturate their Moon images without knowing they are throwing away precious and almost invisible information about our great satellite, if you observe a normal color picture of this zone of the moon (fig. 2, middle image), you will notice a very distinct tone compared to other parts of the image, those differences in color can be enhanced digitally to show hidden features and reveal the chemestry and geologic history of the Moon itself.
To explain the process of obtaining these images I will start with the most simple example: The single shot photography!
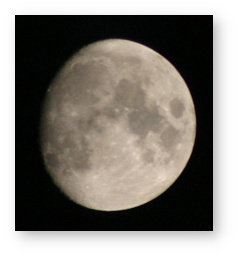
This image as taken with a Canon 300D and a 75-300 III
Canon Lens during a near full moon.

Fig.3
In Photoshop you can try to increase the saturation of the image to show the colors of the moon using the "Hue and Saturation" tool or pressing CTRL+U, but because of the color temperature (white balance) is never at the right spot, one color tone is dominant and overwelms all other colors so the hidden details are not revealed and you get a blue moon or a orange one….

Fig.4
To avoid this issue you must first equalize the image so all color channels have the same importance and the image gets it's most neutral tonality.
There are several ways to do this but none is exact:
- Auto color balance. (CRTL+SHIFT+B)
- Auto color levels. (CRTL+SHIFT+L)
- Try to equalize by hand with the levels histogram (CTRL+L)
I usually use the Auto color balance but some times it destroy information in the highlights.
This is how to do it by hand:

Fig.6
This way you will have the image ready to increase saturation, this "saturation increase" works very well in photoshop, but I've tried it in other softwares and the result was not what I expected, so I'll stick to photoshop for these examples.
Usually I increase the saturation by steps of (+50) at a time 2, 3 or 4 times, for it is quite different if you increase 2X(+50) than 1X(+100)
Here are the examples:

Fig.7
Lets increase the saturation!

Fig.8
You will notice that the image starts to get noisy as saturation increases, because a single frame contains limited information about the subtle greyish colors and it gets much worst if the image was saved in JPEG format because it destroys some of the color information.
This can be fixed the easy way or the hard way!
The "Easy way" doesn't give accurate results but it is easy and fast:
The "Easy way":
The basis for the "easy way" is that the increase in the Saturation disturbs the luminance, and luminance is what gives us detail, so if we recover the luminance from the original image we will restore the detail and keep the new colors too. And to avoid the grain in the color we can blur the color layer a little bit that it wont be much visible and will give a more uniform image:

Fig.9
This is how it is done:

Fig.10
The "hard way" is:
To stack…!!
Stack and stack and stack! doing it by hand is hard work and takes a lot of time, but in 3 megapixel images it is the best way to do it, and mixing evenly as many images you can you will reduce the noise to almost none and get some color detail from the image you're processing. And after that you can just apply the "easy way"(without the gaussian blur), and sharpen the luminance channel a bit, as you have much color information and very little noise, but I advise you to work in 16-bit/channel.
If you're using a webcam to capture the images and a program like Registax to process them, then your job is almost done, but you must process in color and it is best if you save the file as a 16-bit TIFF. Then all you have to do is to equalize the image and increase the saturation etc…
Here are some examples of images made with a Canon 300D at prime-focus of a 10" newtonian:

Fig.11
Stacked 64 images together and processed the luminance with some of the best shots

Fig.12
Stacked 50 images together and added some closeups made with a 2X barlow, each closeup was made of 16 images stacked together.

Fig.13
Notice the detail in blue color of the Aristillus crater, and the orange rim in the Mare Serenitatis.

Fig.14
Compare the color information that can be obtained, with the Galileo's 15 filter color composite!
Lunar atlas made with several images taken with the Canon 300D and a 10" Newtonian
(click on the image for a larger version)
Advise in capturing images for processing:
- Allways use a low ISO value
- Never use gain.
- Try to keep the moon in the midtones, never to bright or too dark.
- Use daylight white balance
- Do not use high compression in JPEG images
Links:
- Atalaia
- Lunar photo of the day.
- Moonbeams and elements
- Recipe for High-Titanium Lunar Magmas
- Galileo false color composite
- Perseu
Credits:
- Fig. 2 – Alberto Fernando, José Ribeiro, Filipe Alves
- Fig.14 – Galileo image – Courtesy NASA/JPL-Caltech
- All other images – Filipe Alves
Special thanks to:
Alberto Fernando
Alfonso Portela
Ana Sousa
Charles Wood
Hugo Silva
José Ribeiro
João Gregório (Astro Gregas)
And everyone else from the group Atalaia! 🙂
Good Luck, and have fun!
Filipe Alves
© Filipe Alves, 2004

